Physical Address
304 North Cardinal St.
Dorchester Center, MA 02124
Physical Address
304 North Cardinal St.
Dorchester Center, MA 02124
The future of business is autonomous. Imagine an AI that can not only understand your goals but also independently strategize, execute tasks, and learn, all without constant human oversight. Welcome to the era of Auto-GPT, a groundbreaking open-source AI agent designed to revolutionize business operations by automating complex workflows and driving innovation. This tutorial is your express ticket to harnessing this power.
Auto-GPT is an experimental open-source application that showcases the capabilities of large language models (LLMs) like OpenAI’s GPT-4. Unlike traditional AI chatbots that require continuous prompting, Auto-GPT operates as an autonomous agent. Given a high-level goal, it can break down the task into sub-tasks, use internet browsing, generate code, perform file I/O, and leverage other tools to achieve its objectives. For businesses, this translates into unprecedented potential for automated market research, content generation, strategic planning, customer service, and much more, allowing your team to focus on higher-value activities.
In today’s fast-paced business environment, efficiency and innovation are paramount. Auto-GPT offers a unique advantage:
This guide is specifically tailored for Windows users, providing a clear, step-by-step path to get Auto-GPT up and running within minutes. We’ll leverage common development tools like Python, Git, and Visual Studio Code, ensuring a robust and efficient setup.
To embark on your Auto-GPT journey, you’ll need a few essential tools and a crucial API key. Please ensure you have the following ready:
Now, let’s gather the software tools:
    <!-- Tools & Resources mentioned in the Video -->
    Auto GPT - <a href="https://GitHub.com/Significant-Gravitas/Auto-GPT">https://github.com/Significant-Gravitas/Auto-GPT</a>
    Git - <a href="https://git-scm.com/download/win">https://git-scm.com/download/win</a>
    Python - <a href="https://www.python.org/downloads/">https://www.python.org/downloads/</a>
    Visual Studio Code - <a href="https://visualstudio.microsoft.com/downloads/">https://visualstudio.microsoft.com/downloads/</a>
Follow these steps carefully to get Auto-GPT operational on your Windows machine. This entire process can be completed in approximately 10 minutes if you follow along precisely.
Python is the foundational language for Auto-GPT. Ensure you install a supported version (3.10 or later is recommended).
cmd in Windows Search) and type:
python --version You should see the installed Python version (e.g., Python 3.11.5).
Git is used to clone (download) the Auto-GPT project from its GitHub repository.
git --version You should see the installed Git version (e.g., git version 2.42.0.windows.2).
While you can use any text editor, Visual Studio Code (VS Code) is a popular, powerful, and free option ideal for editing code and configuration files.
Now it’s time to download the Auto-GPT project files.
AI_Projects on your C: drive and then navigate into it:
cd C:\
mkdir AI_Projects
cd AI_Projectsgit clone https://github.com/Significant-Gravitas/Auto-GPT.gitThis command downloads all the necessary files from the official Auto-GPT GitHub repository into a new folder named Auto-GPT within your current directory (AI_Projects in this example).
Auto-GPT directory:
cd Auto-GPTAuto-GPT relies on several Python libraries. These need to be installed.
Auto-GPT directory in your Command Prompt, run the following command:
pip install -r requirements.txtThis command reads the requirements.txt file, which lists all the necessary Python libraries, and installs them using pip, Python’s package installer. This may take a few moments.
This is the most critical step for allowing Auto-GPT to access OpenAI’s powerful language models.
Auto-GPT directory, you’ll find a file named .env.template. This is a template for your environment variables. You need to rename it and then edit it. In your Command Prompt, type:
copy .env.template .env.env file using Visual Studio Code:
code .env (If code command doesn’t work, open VS Code manually, then File > Open File... and navigate to your Auto-GPT folder and select .env).
.env file, locate the line that says OPENAI_API_KEY=YOUR_API_KEY.
YOUR_API_KEY with your actual OpenAI API key (which you obtained from OpenAI Platform). It should look something like OPENAI_API_KEY=sk-xxxxxxxxxxxxxxxxxxxxxxxxxxxxxxxxxxxxxxxxxxxx..env file, you might also consider setting other optional configurations, such as:
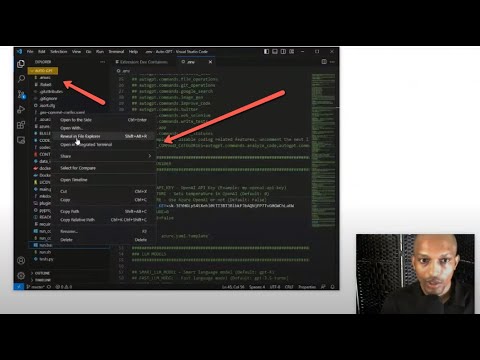
MEMORY_BACKEND: For persistent memory (e.g., MEMORY_BACKEND=redis or MEMORY_BACKEND=pinecone if you set up those services). For a quick start, you can leave it commented out or set to NO_MEMORY if it’s explicitly there.ALLOW_LAUNCH_BROWSER: Set to True if you want Auto-GPT to be able to launch a web browser. (Be cautious with this in production environments)..env file and close Visual Studio Code.You’re now ready to launch Auto-GPT!
Auto-GPT directory, execute one of the following commands:
python -m autogpt OR (as suggested by the comments for Windows users, though python -m autogpt is generally preferred for direct python execution)
.\run.batThe .\run.bat script is a simple batch file that usually just calls the python command, making it slightly more convenient for Windows users.
When Auto-GPT launches, it will prompt you for interaction:
Welcome to Auto-GPT!  Enter the name of your AI and its role below.
AI Name: [Enter a name, e.g., "Marketing_Strategist_AI"]
AI Role: [Describe its role, e.g., "An AI designed to develop content marketing strategies."]
Enter up to 5 goals for your AI:
Goal 1: [e.g., "Research the latest trends in sustainable packaging."]
Goal 2: [e.g., "Identify key competitors in the eco-friendly product market."]
Goal 3: [e.g., "Draft a content calendar for a blog focusing on environmental sustainability."]
Goal 4:
Goal 5:
After defining its goals, Auto-GPT will begin its autonomous operation. It will present its thoughts, reasoning, and proposed actions. You’ll then be prompted to authorize its next step (y to authorize, n to deny, y -N to authorize N consecutive commands).
Example Business Goals for Auto-GPT:
Always start with clear, concise, and achievable goals. Monitor its progress, especially in the initial stages, to understand its capabilities and limitations.
To get the most out of Auto-GPT for your business:
.env file). This allows Auto-GPT to retain information across sessions, improving coherence and efficiency.ALLOW_LAUNCH_BROWSER or file writing permissions are enabled.While this guide aims for a smooth setup, you might encounter minor hurdles:
pip not recognized: Revisit Step 1. Ensure “Add Python.exe to PATH” was checked during installation. If not, you may need to reinstall Python or manually add it to your system’s PATH environment variables..env file for typos in your OPENAI_API_KEY. Ensure there are no extra spaces. Also, verify your OpenAI account has sufficient credits.pip install -r requirements.txt fails, ensure you have a stable internet connection. Try running pip install --upgrade pip first, then retry the dependency installation.pip install, .env configuration) are largely the same for macOS and Linux. The primary difference would be how run.bat is executed (usually via python -m autogpt directly) and command-line paths. Visual Studio Code is cross-platform.You’ve successfully set up Auto-GPT on your Windows machine, opening up a world of autonomous AI possibilities for your business. From automating routine tasks to generating innovative strategies, Auto-GPT is a powerful tool that can significantly enhance productivity and decision-making. The journey with AI is continuous, so keep experimenting, refining your prompts, and exploring the vast potential of autonomous agents. Embrace the future, one intelligent step at a time!
While this guide specifically targets Windows, the core principles and steps are largely transferable to macOS and Linux. You’ll still need Python, Git, and an OpenAI API key. The primary differences involve platform-specific Python/Git installation methods and how you’d execute the main script (usually `python -m autogpt` directly instead of a `.bat` file). Visual Studio Code is cross-platform, and the `.env` configuration process is identical.
Auto-GPT itself is open-source and free to download and run. However, it relies on OpenAI’s language models (like GPT-3.5 or GPT-4), which are paid services. You will need an OpenAI API key, and your usage will incur costs based on the number of tokens consumed by the AI’s operations. Monitoring your OpenAI dashboard is recommended to manage expenses.
Auto-GPT excels at automating a wide range of tasks, including but not limited to: market research and competitor analysis, generating content (blog posts, social media updates, marketing copy), drafting business plans or strategies, code generation, summarising long documents, conducting online research, and even basic data analysis. Its effectiveness depends on how clearly and precisely you define its goals.
The time required for Auto-GPT to complete a task varies significantly based on its complexity, the clarity of the goals, and the number of iterations required. Simple research tasks might be completed in minutes, while complex strategic planning or extensive content generation could take hours, or even require multiple runs and refinements of goals. It’s an iterative process, and initial tasks often serve to refine subsequent ones.
Auto-GPT is an experimental tool, and it’s not uncommon for it to get ‘stuck’ or enter loops. If this happens, you can usually interrupt the process (Ctrl+C in the command prompt). Review its last thoughts and actions, then consider refining your goals to be more specific, breaking down complex goals into smaller sub-goals, or adjusting your `.env` settings (e.g., memory configuration). Sometimes, simply restarting with the same goals can yield different results due to the stochastic nature of LLMs.